
Hello! So, I realize that today is March 24, and many of you have probably already seen The Hunger Games movie, but I hope you enjoy this nail tutorial nonetheless. I went to the midnight release and loved it! At first I wasn't sure how I felt about it, but after pondering throughout the next school day, I came to the conclusion that it was so perfect. I have to go see it again! Any who, this is the nail look I wore for the premiere! Enjoy(:
Step 1: Sponge a red nail polish on the bottom half of your nails.

Step 2: Sponge the remaining top half of your nails with a yellow polish.
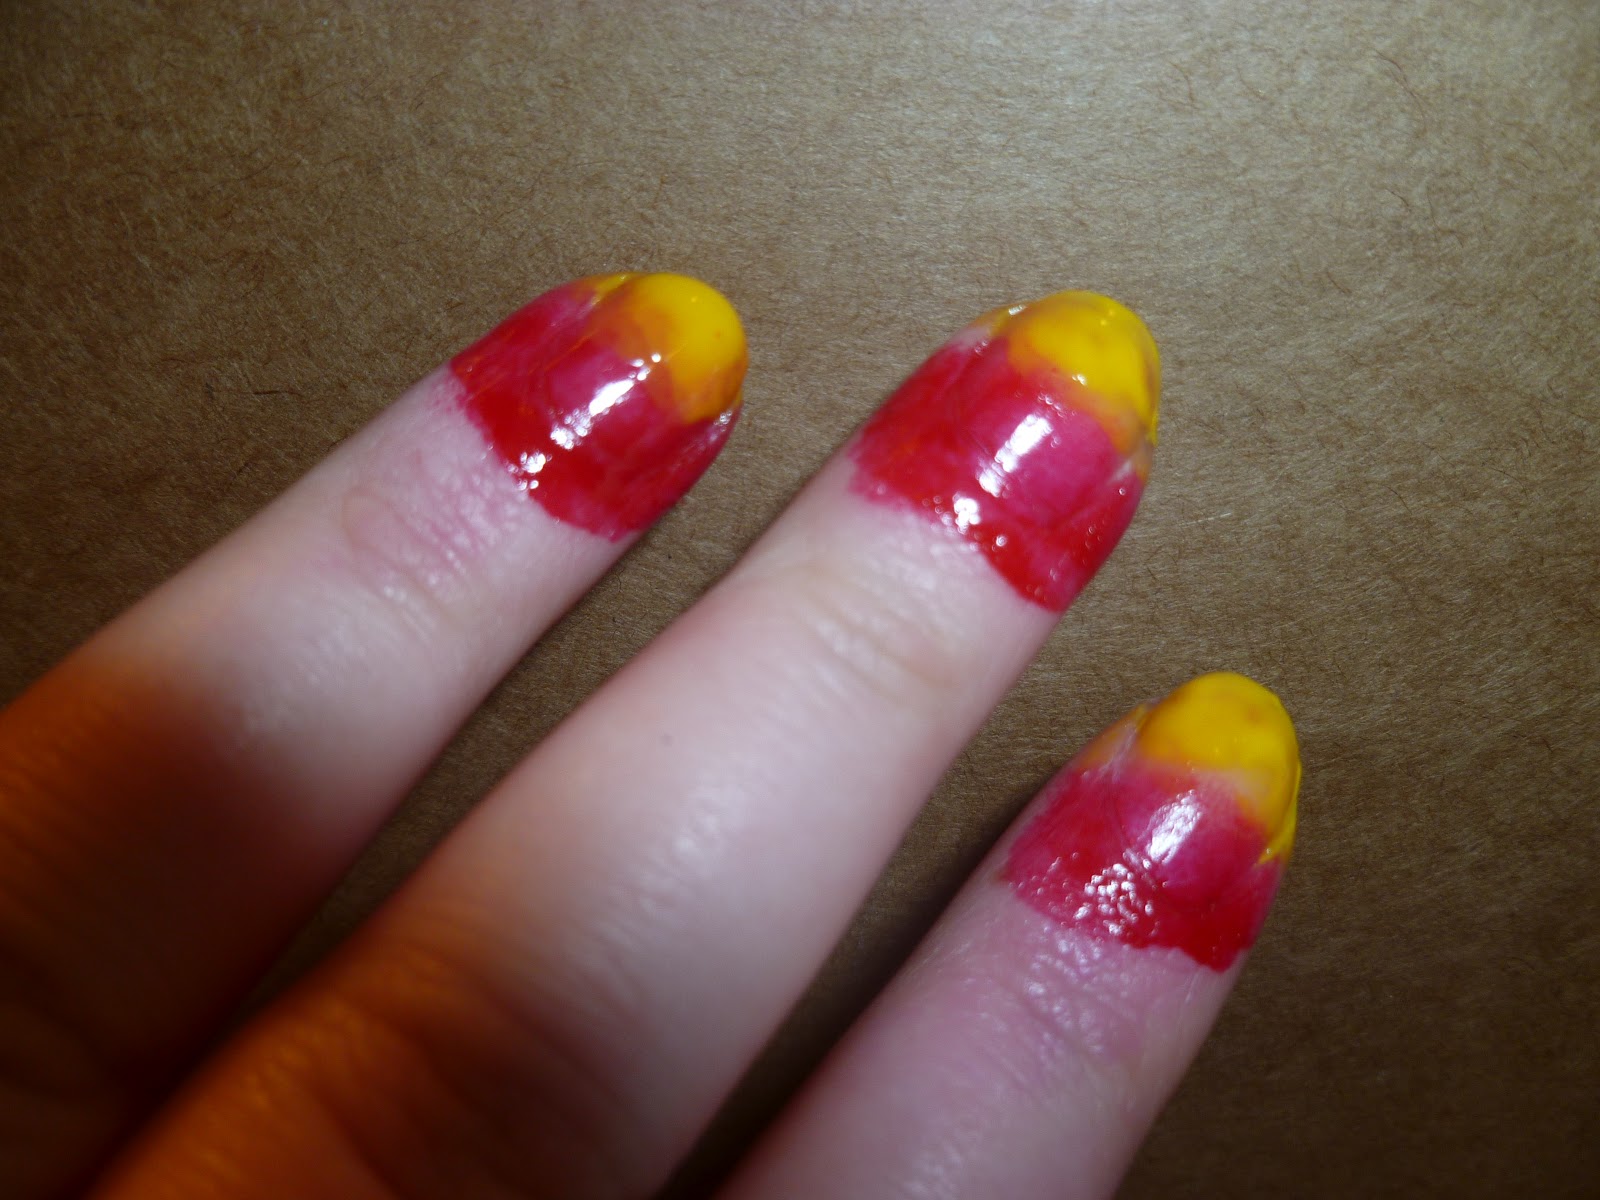
Step 3: Fill in any empty space with orange polish while also blending your yellow and red together to create a gradient effect.

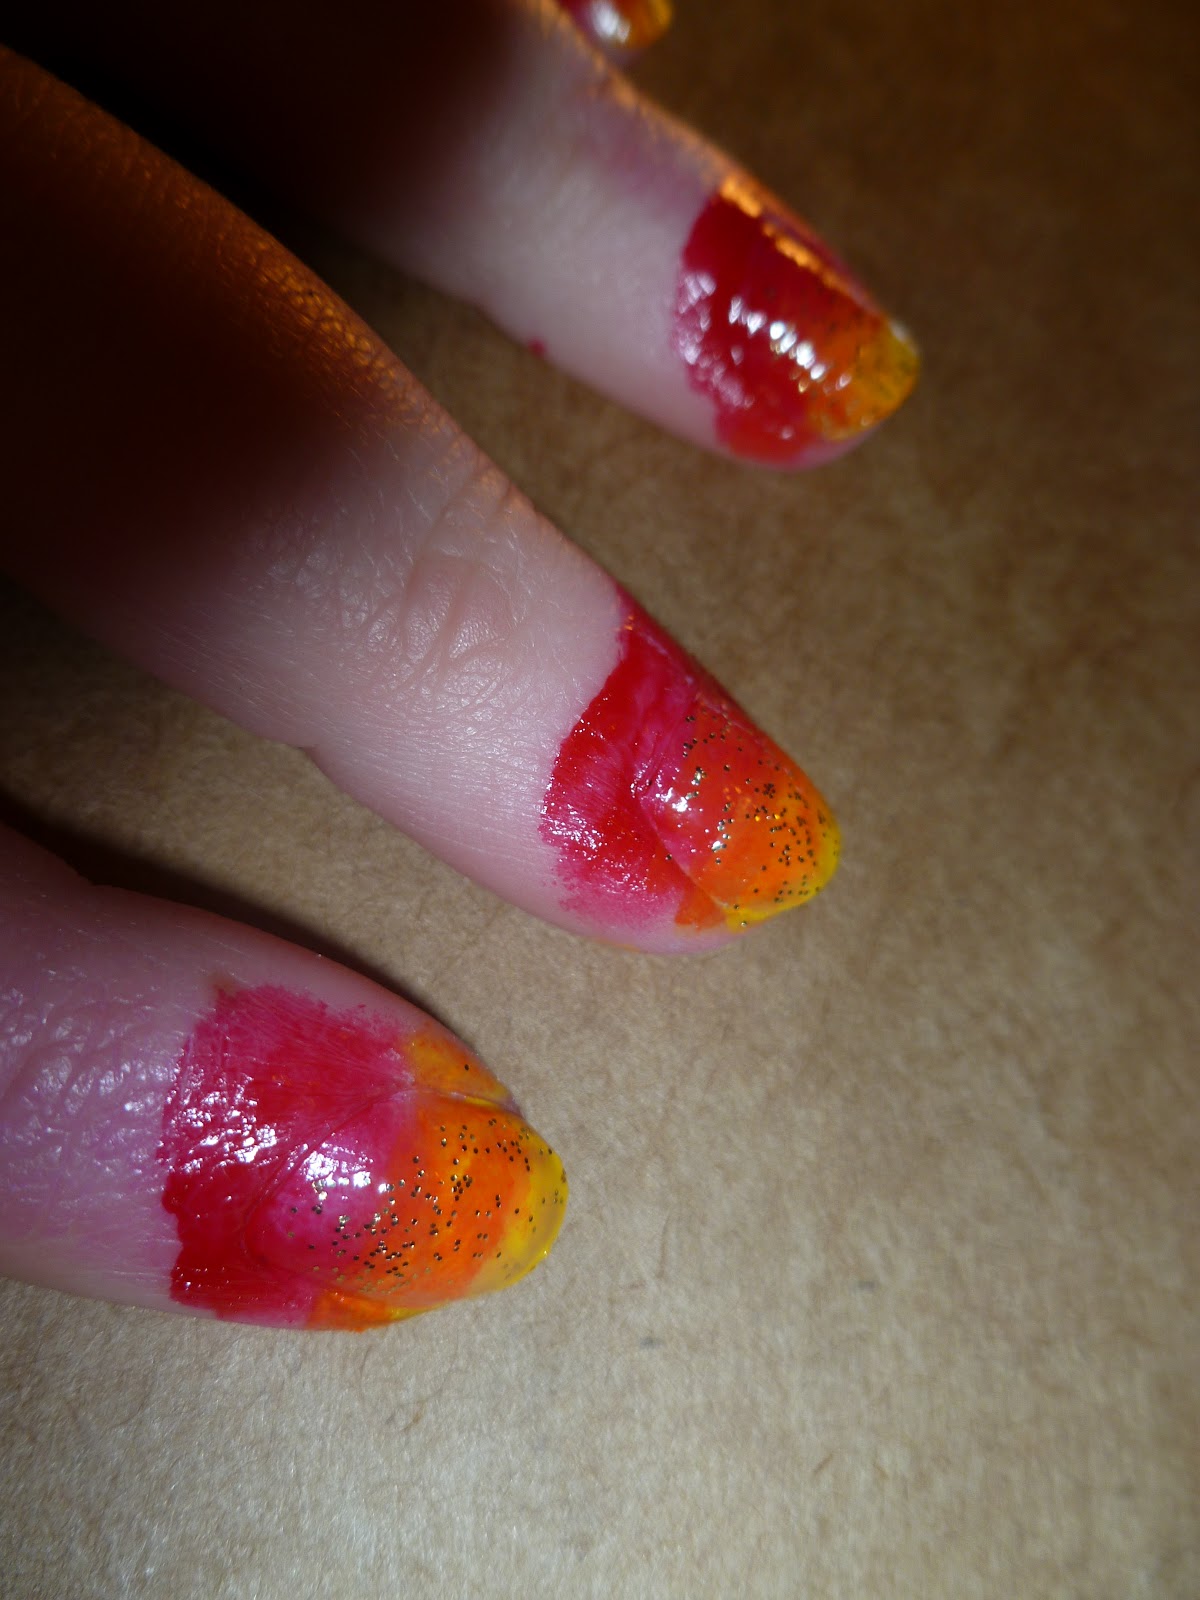
Step 4: Apply a gold glitter polish all over your nail to enhance the fire-y effect. I apologize for the rotation of this picture, I don't know why this happened!
Step 5: Using a striper (or any tool you have available), outline a flame (resembling that of a candle) in black polish. Again, sorry for the rotation.

Step 6: Fill in the exterior of your flame with black polish. Then, finish with a top coat.

Step 7: Use a cotton swab dipped in clear polish to clean up around the edges of your nails, and you're done!

Thanks so much for checking out this tutorial! Got requests for future nail designs? Let me know!
-Ali
Products Used:
Unfortunately, many of these products aren't fully labeled, but I gave as much info as I could find.
- Red Polish: Avon Nailwear Pro
- Yellow Polish: Icing nail polish in Smooth Like Butta
- Orange Polish: Sephora by OPI
- Gold Glitter Polish: Avon Nailwear Pro
- Black Polish w/ built-in Striper: Claire's two-way nail art pen and brush
- Black Polish: China Glaze in Liquid Leather
- Clear Top Coat: In A Hurry Air Dry Top Coat